Let’s Git Started
Bad puns aside, Git is a very powerful tool. For those who don’t know, git is a version-control system used for tracking source code during software development. It’s an amazing tool for team development because it allows multiple people to contribute code to the same project, but did you know that git can do wonders for your solo workflow as well?
Branches
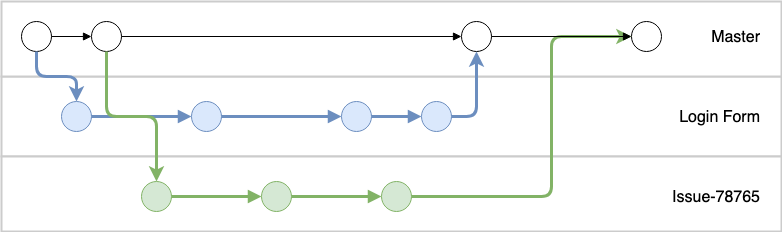
With git, there exists a concept called branches. A branch is a simply a pointer to a commit within git. When you initialize a git repo, it will have a default branch called master. It is generally considered good practice to keep the master branch of a project clean and functional.
For team-based projects, branching allows multiple contributors to push code to the same repository (each contributor would likely have their own branch). The benefit for branching in a team project becomes immediately clear knowing this, but why should we branch as a solo developer? You may ask yourself, “If I’m the only one working on a project, why do I should I bother with creating different branches for it?“.
Well, branching is a good practice to get into, even as a solo developer. Using branching, you can ensure that your master branch is always working correctly, and maintain an easy to read history of what has been done. Branching also gives you a way to split up features and issues into their own sections. This is extremely useful for larger projects. With branching, you can easily roll back features as well. Let’s say you you added some pretty crummy code to a feature branch, and it got merged into the master branch, breaking it a week later (I’ll explain the concept of branch merging, called a pull request, later in the article), well this merge can easily be rolled back, thus reverting the master branch to a working state.
Creating a Project
Let’s step through starting a new project and initialize a git repo for it. Let’s create an application that displayed “Hello universe” (because Hello world programs are so 2018).
Initialization
In your terminal create a folder for your project, we’ll call this one “Hello Universe”
mkdir ~/HelloUniverse && cd ~/HelloUniverse

git init
Great! We now have our project initialized as a git repository! When we initialize a git repository, it automatically creates the master branch for it. You can verify what branch you are on by issuing the command git status.
As you can see (via that git status output), we’re on the master branch, and do not have any commits yet.
Commits
Commits are essentially recorded changes to the repository. So, let’s say we added a few files to the ~/HelloUniverse directory and want to add these to the git repo, we can do so by issuing a git add . command to add all new files within the current directory to the git project, then a git commit -m "your commit messages" command to commit the changes to the current branch.
Here, we will create an index.js file that will output “Hello Universe” to the console, add it to our git repository, but instead of adding this directly to the master branch of the project, we will create a new branch called HelloUniverse and commit our changes to that branch. What this does is it allows the master branch of our project to remain clean and working.
We can create and switch to a new branch by issuing a git checkout -b [branch name] command. Once we’ve switched branches, issue a git status command to verify what branch you are on.
git checkout -b HelloUniverse

git status
Your terminal should verify you’ve switched to a new branch.

Now we can go ahead and create our index.js file, and add it to our newly created branch. For the sake of simplicity, I’ll create index.js in one line, but in normal practice, you’d likely be using a text editor or IDE to create this file.
echo "console.log('Hello Universe')" >> index.js

git add index.js

git commit -m "Added a friendly greeting."
Pro Tip: Commit often! Each commit should be representative of a minimal piece of work. Committing often gives you a history of what you’ve done, and will allow you to roll back any changes if you accidentally introduce something breaking to your project.
Another Pro Tip: Your commit messages should be minimal, but also explain what has been done. An example of a good commit message would be “Fixed typo in README.md”. Commit messages can span multiple lines for larger changes.
Creating the Origin
We have our files committed to our HelloUniverse branch, but we don’t have the repository stored anywhere else! How can we remedy this? Head over to https://github.com (or whatever cloud service you are using) and create your repository, go through the process to initialize the repository with a README.md file, and add the created repository as a source for your local repository.
For a repository on GitHub (assuming you are using HTTPS)
git remote add origin https://github.com/[your username]/[your git repo]
If you are using SSH (which in most cases, you should be) you’ll have to add your SSH public key to your GitHub account, then issue this command (notice that the only differences are the origin url).
git remote add origin git@github.com:[your username]/[your git repo]
Let’s break this command down a bit before we actually push our code there. What this command does is adds a remote repository url to your existing git repo. This allows you to push any committed changes that you’ve made locally to the remote repository. The origin part of the command is just an alias for your system that points to a remote repository.
Pro tip: At any time, you can see what your origin is by issuing a git remote -v command.

Pushing your Changes
So, we’re still on the HelloUniverse branch, we have our code created, we have our repository created and added, and now we want to push our local changes to the remote repository.
Once the changes are committed, we can issue this command to push our changes to GitHub. The format for this command is git push [source] [branch name].
git push origin HelloUniverse
Note: If you are using a fresh install of git, you may need to first identify yourself to git via the git config command. You may also have to generate a README or other file to initially initialize the master branch of the repo. GitHub can do this for you upon creating a repository.
You should see something like the this on a successful push.

Take note of the Create a pull request for 'HelloUniverse' line, as that is the next step!
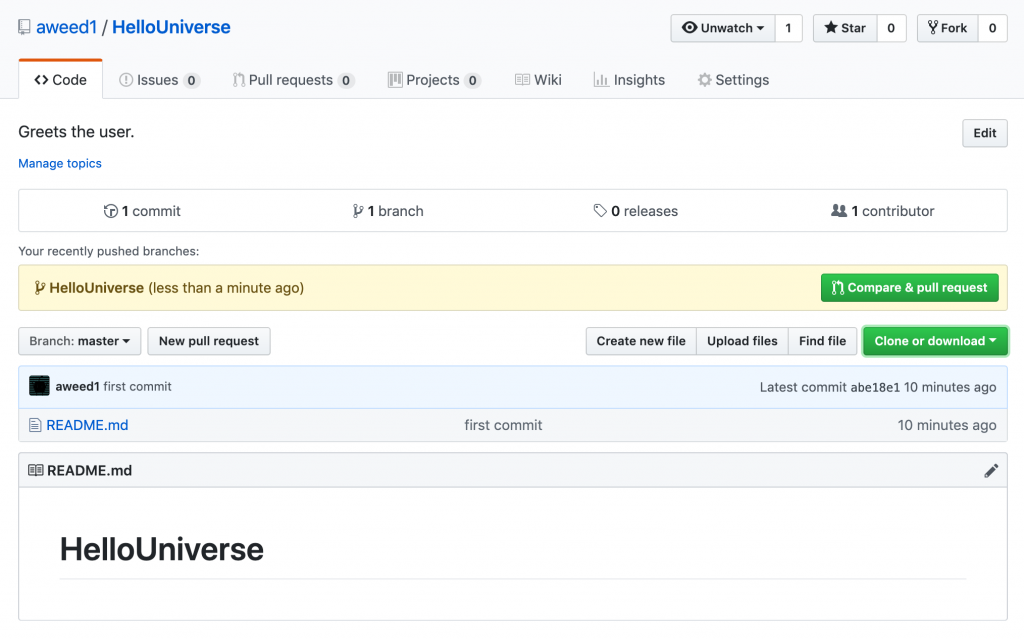
If you head over to your GitHub repository, you can verify that GitHub sees the HelloUniverse branch, and it will ask you if you want to issue a pull request to merge this branch with the master branch.
Pull Requests
A pull request is a powerful concept, and a staple of git workflows. A pull request is basically a request to merge one branch with the master branch of a repo. So when I issue a pull request for the HelloUniverse branch I am telling GitHub: “My HelloUniverse branch is tested and working, and I would like to merge it into the master branch.” Merging branches sounds like it could get messy, luckily GitHub (as well as other source control platforms) does a good job of checking for any potential merge errors.
When you head to GitHub and click the [Compare & pull request] button, that tool will run, and provide any feedback for you to fix potential issues before the merge (don’t worry, one of the great things about using a code -> branch -> pull request workflow is that if a bad merge occurs, it can easily be rolled back).
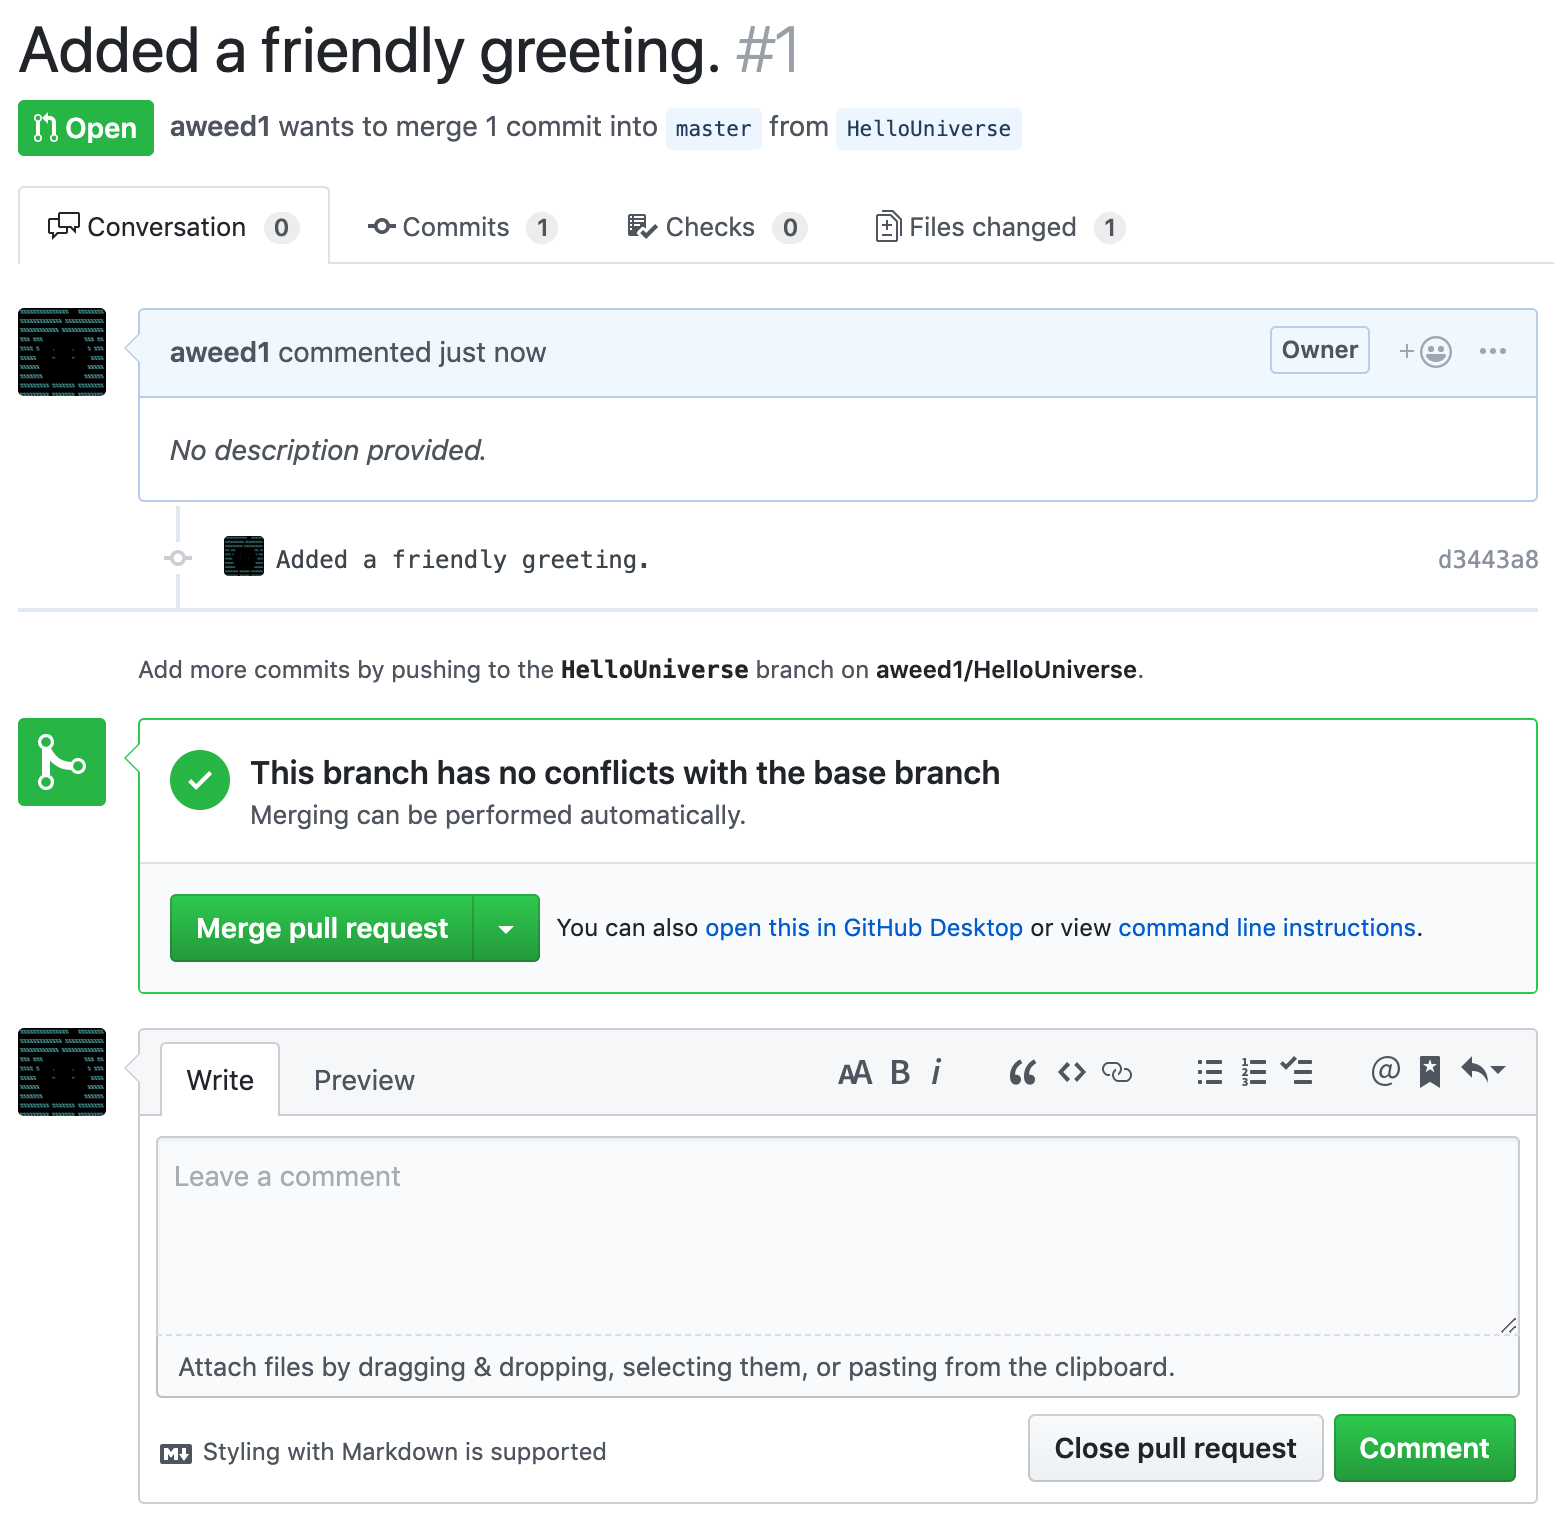
When you click on the pull request button described above, GitHub will greet you with the following screen.
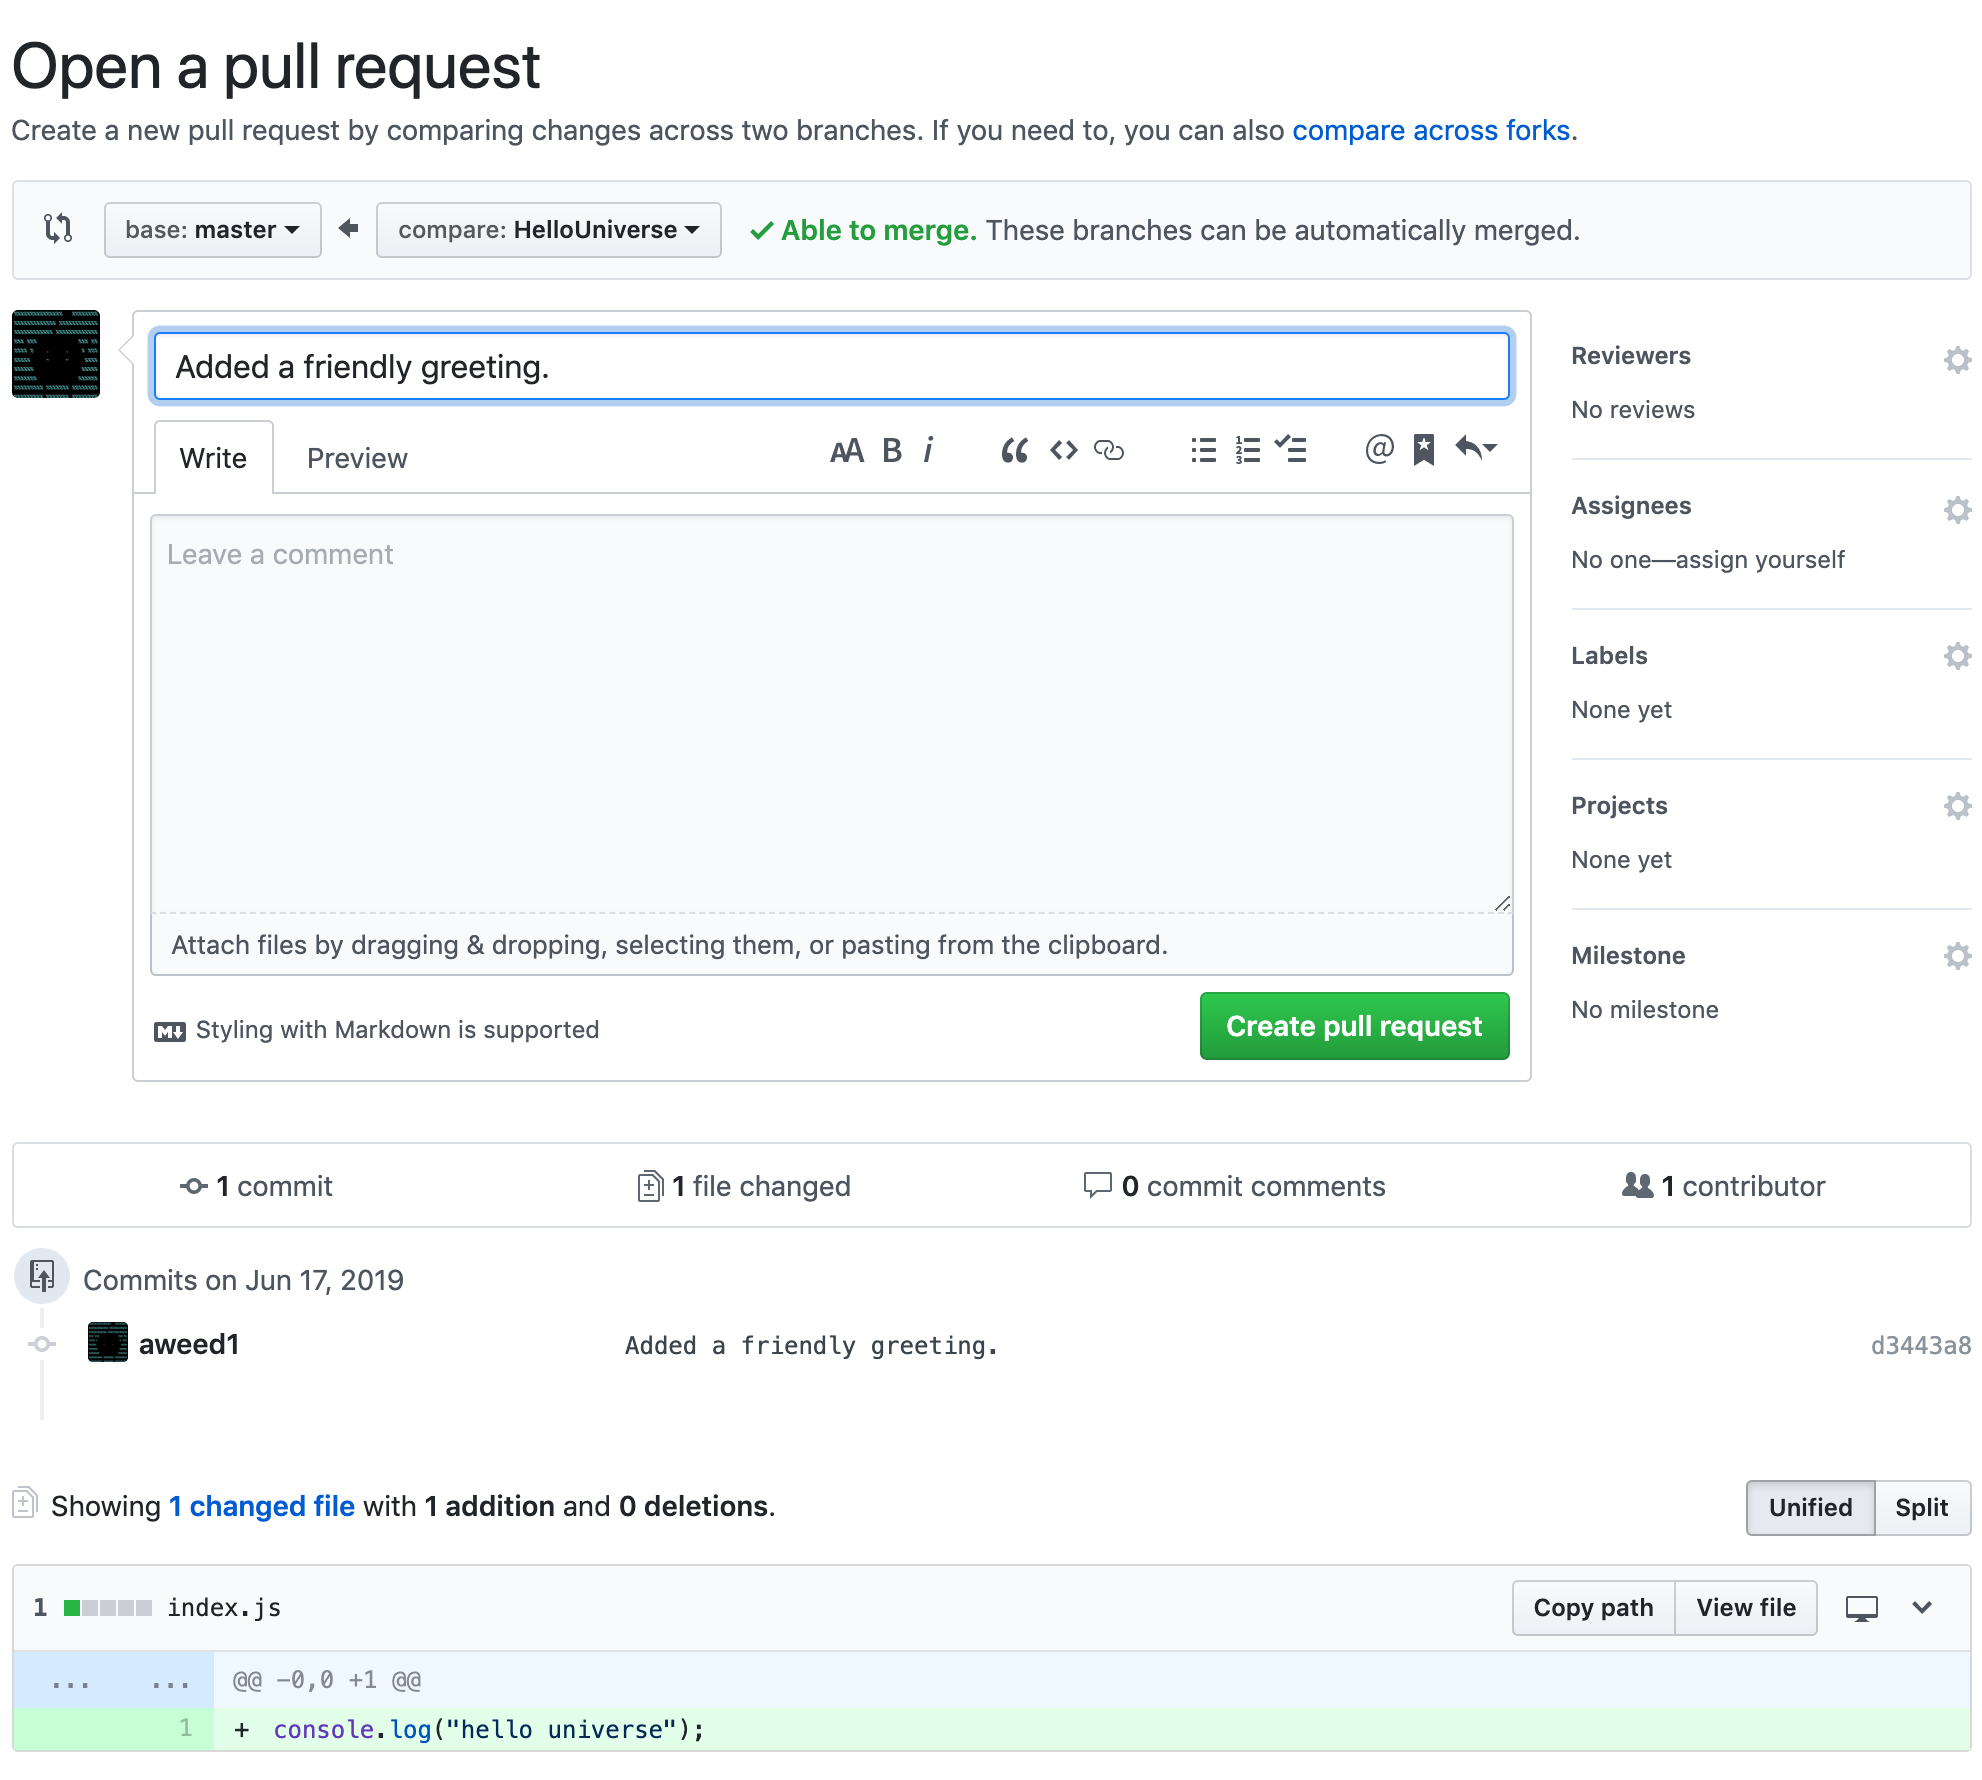
And now we can finalize our pull request, which will merge HelloUniverse into master.
It’s that easy! Clicking the [Merge pull request] button will run the merge. You should now see index.js (or whatever files you added) in your master branch on the repository’s page. Woohoo!
TLDR
- Git can be leveraged as a powerful tool for solo developers, even though it’s primarily geared towards team-based workflows.
- Adopting a branch-heavy workflow allow you to keep your code separate from the
masterbranch. - Committing often allows you to track and rollback problematic changes.
- Commit messages should be minimal, yet descriptive enough to represent what has been changed.