The Teaching and Learning Commons (TLC) and the Accessibility at Swarthmore teams have joined forces to bring you a customizable syllabus template for Fall 2025. Members of the Swarthmore community can download the accessible syllabus template from Google Drive as a Word document. In addition to offering a time-saving resource for course planning, we hope that the template also serves as a useful tool for learning and reflecting on both course design and accessibility.
Important note: This blog post and the accessible syllabus template are meant to be used alongside one another, with this post covering the accessibility principles in more depth.
Content
The content of the accessible syllabus template draws from various sources on backward design. Backward design is an approach to course development that begins with articulating what you want students to know and be able to do by the end of the course and then planning assignments and activities that will help them to get there. The template also includes Swarthmore-specific resource links, such as
- the Academic Calendar,
- the faculty guide to AI,
- the Textbook Affordability Program (TAP),
- and more.
Format
The accessible syllabus template follows the principles of document accessibility. It uses Styles to allow assistive technology (AT)—such as screen readers—to process the syllabus correctly. Instructors will also notice that all students—including those with print disabilities—will be able to access the information in the syllabus more easily.
Because both backward design and document accessibility may be new to some syllabus writers, we’ve embedded
- brief explanations in each section of the template,
- links to learn more,
- and a reference list.
Since not every section of the template will be right for every professor or every course, we encourage you to adapt the sections as you see fit. By using Styles to maintain the format and using the principles of accessibility described in the document and in the following post, you’ll be able to keep this syllabus (and other Word documents) 99% accessible while also making them your own.
How to use the accessible syllabus template
- Download the accessible syllabus template by selecting the More Actions menu—signified by three vertical dots—and selecting Download.
- Open your downloaded template on your local install of Microsoft Office.
- Save a copy of the template as you would as a syllabus for your course using the File > Save a copy or File > Save as… navigation.
- Read the introductory first three pages of the Accessible Syllabus Template for context and guidance.
- Turn on View all characters by navigating to the Home Ribbon > Paragraph section (3rd section from left) > select the pilcrow ¶.
- Turn on the Navigation Pane from the View Ribbon > Show section (4th section from the left) > select Navigation Pane.
- Edit pieces of information on the template that are:
- preceded by the word “Suggestion:”;
- highlighted;
- or in brackets [ ].
- Run the Accessibility Checker from the Review Ribbon > Accessibility section (3rd section from the left) > select Check Accessibility.
- Remedy any issues in the Accessibility Checker.
- Remove the first three pages.
- Save your accessible syllabus!
How to share your syllabus
With your syllabus ready to go, you can choose to share it in a number of ways:
- Upload the Word document to your Moodle site.
- Create a PDF of the syllabus by going to File > Save a copy > or File > Save as… and then selecting PDF from File Format menu, in the Export As section. Save and then upload that to your Moodle site.
- Share the file with your course via a link on your Moodle site by going to the Share menu (top right in Word) > Move or copy to the cloud > Upload. Return to the Share menu (top right in Word) > copy link. You can also play with permissions here, such as only allowing view access.
- Upload the Word or PDF to your Google Drive and share that link with your class.
- Something else entirely.
See: Adobe Acrobat for PDFs in Creating Accessible Documents and PDFs | Swarthmore ITS KnowledgeBase (KB).
Important note: If you import your Word document to Google Docs so that it can be opened as a Google Doc, you will lose important accessibility features and AT functionality. If you share it as a Google Doc, then we recommend installing and running the Grackle Docs accessibility checker at the very least.
Accessibility explainers
Built-in Styles for headings add structure
Structuring a document using headings creates a visually distinct and semantically unique outline that provides a few benefits:
- logical flow;
- improved readability;
- and improved understanding.
Folks with cognitive, organizational, or executive function skills that wax and wane, and those who use assistive technologies (screen readers, Read Write&Gold, Kurzwell, etc.) often find a structured document much easier to consume. Assistive technologies, in particular, benefit from this practice as doing so allows users to navigate by:
- viewing a list of headings;
- reading or jumping through a document by headings;
- or choosing document sections by headings.
There are two images below:
- the one on the left is using a faked heading: one that is formatted to look like a heading but really isn’t.
- The one on the right is using a built-in style heading. It is visually distinct and semantically distinguishable from a regular text styled as Normal.

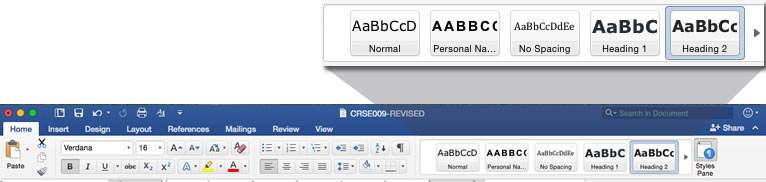
Use built-in Styles
Creating a heading by changing the format of text directly in a Word document doesn’t help end users and doesn’t help you. We highlight text and apply a different font type, a larger font size, bold formatting, etc. Changing the look using the Font formatting only changes the look for one item; but if you use a Style, you can change the look of every element of that Style in the document.
The built-in Styles are located in the Home Ribbon.

Alter style by using the Styles Pane

If you do not like the look and feel of a Style element, change it. In the Home Ribbon,
- choose Styles Pane,
- then choose Modify Style.
Bonus Benefits
When you are using the built-in Styles, you get a couple of great bonuses:
- change look and feel of elements with a couple of clicks;
- easily create a table of contents for any document;
- option to auto-update all of that Style at once throughout the document.
Create descriptive hyperlinks
Hyperlinks allow web-users of the Word document to navigate directly to a specific website. To add a hyperlink,
- highlight/select the text you want to lead elsewhere,
- click CTRL+k or CMD+k,
- and insert the target web address.
Make sure your link text is descriptive, i.e. that it tells the reader something about the target destination. Hyperlinks labeled “Read more,” “Click here,” or the like are not useful.
Citations with a hyperlink could look something like:
Auerbach, Jonathan, and Russ Castronovo, eds. “Introduction: Thirteen Propositions About Propaganda.” The Oxford handbook of propaganda studies. Oxford University Press, 2013.
or
Auerbach, Jonathan, and Russ Castronovo, eds. “Introduction: Thirteen Propositions About Propaganda.” The Oxford handbook of propaganda studies. Oxford University Press, 2013.
See:
If including images, add alternative text (alt-text)
In Word,
- Select the image you’re adding alternative text to.
- Right-click or control-click the image to pull up a menu.
- Select View Alt Text.
- Edit the alt text accordingly.
See:
- Video: Improve Accessibility with alt text | Microsoft Office Support.
- Images Tutorial | Web Accessibility Initiative (WAI) | W3C.
Check contrast colors
As you may know, colorblindness is quite common. Additionally, many of us end up needing glasses to see eventually. This makes contrast important, and we strive to meet a minimum of 4.5:1 contrast ratio. You can test your color selections with the WebAIM Contrast Checker.
Use bulleted or numbered lists
Using lists can help break up longer readings and paragraphs to assist with readability. A few guidelines for lists:
- If there’s only one item, it’s not a list.
- Numbered lists are only used when priority matters or following steps matters, such as in recipes or lab directions.
- The list must be identified as a list. Creating bullets by simply inserting a shape—including emojis—does not create a list.
Insert tables
As stated in the accessible syllabus template, “Tables are notoriously difficult for assistive technology.” To insert a table in Word properly:
- Navigate to the Insert ribbon.
- Select Table from the second section from left on the Home Ribbon.
- Define the layout you will need.
If a single table crosses multiple pages, you must repeat the header row on each page.
- Select the crosshairs at the top left corner of the table to select the table that is crossing multiple pages.
- A new Table Layout Ribbon now appears at the top of the screen. Select Table Layout.
- Look for the Repeat Header Rows option near the far right of the options available. Select Repeat Header Rows.
Important Note: This step needs to be done for each table individually after you finish editing your text, since the locations of tables may change as you adjust your document.
See:
- Video: Create accessible tables in Word | Microsoft Support.
- Creating an Accessible Table in Word | Perkins
(Don’t) Use Headers and Footers
Headers and footers are not recognized by assistive technology. Footers usually contain things like page numbers, and we do recommend pagination to understand where one is in a document for folks who have vision. However, since AT does not read what’s in a header or a footer,
- make sure only non-essential information is in a header or footer;
- Or repeat the essential information in the body text.
Questions?
You can reach out to the Teaching and Learning Commons via email with questions about syllabus content or backward design.
You can reach anyone on the accessibility team via email or, if you’d like to walk through any of the steps together, schedule time with accessibility.
These instructions are adapted from Corrine Schoeb’s post from 2017, Formatting Syllabi in Word (or any other Word document).