Panopto is our video streaming and lecture capture system that makes it easy to stream, record, and share videos within Moodle. Panopto can capture your computer screen, PowerPoint slides, audio, and/or video from webcams and other devices to record lectures, student or guest presentations, demonstrations, and/or supplemental materials. You can also integrate Moodle, Zoom, and Panopto so that Zoom meeting cloud recordings automatically show up on your Moodle course page.
Why use Panopto?
Panopto can be used to:
- Record lectures during class so students can view them later
- Record mini supplemental videos to be viewed outside of class
- Record student or guest presentations
- Upload previously recorded video or audio files into Panopto and share in Moodle
- Automatically import Zoom meeting cloud recordings into Moodle
In this post, I’ll be sharing 3 different ways you can use Panopto video in Moodle.
#1 The Panopto Block
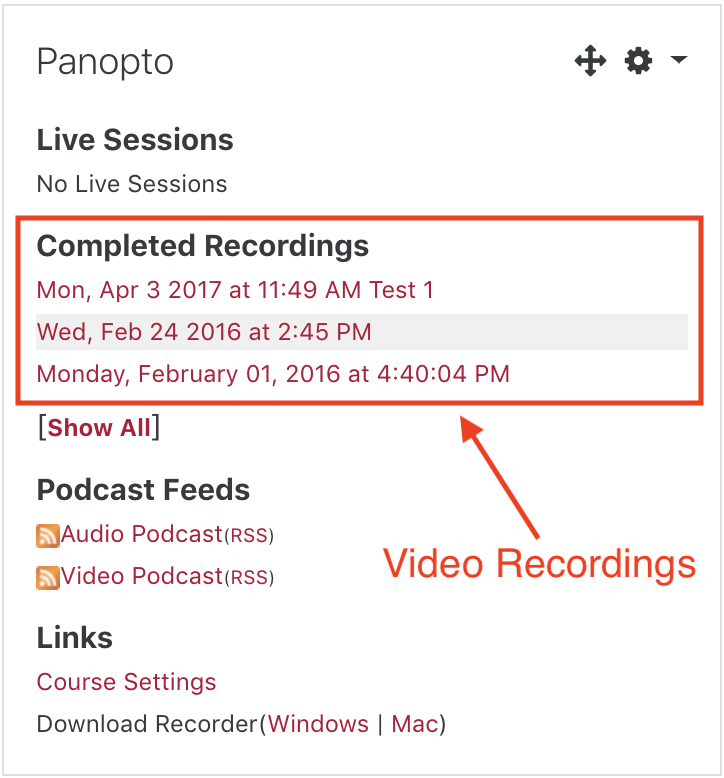
Panopto is a permission-based system that may require students to use their Swarthmore login to view certain videos. In order to mitigate any permission issues, we suggest adding the Panopto Block to your Moodle page first. Once the Panopto Block is added to the course, you and your students will automatically be given permission to watch any videos you put into your Panopto course folder.
The Panopto Block will also display any video recordings you create or upload directly to your course folder.
For further instruction, take a look at our Help Documentation page on how to Set up Panopto in Moodle.
#2 Embed Panopto Videos into a Moodle Page
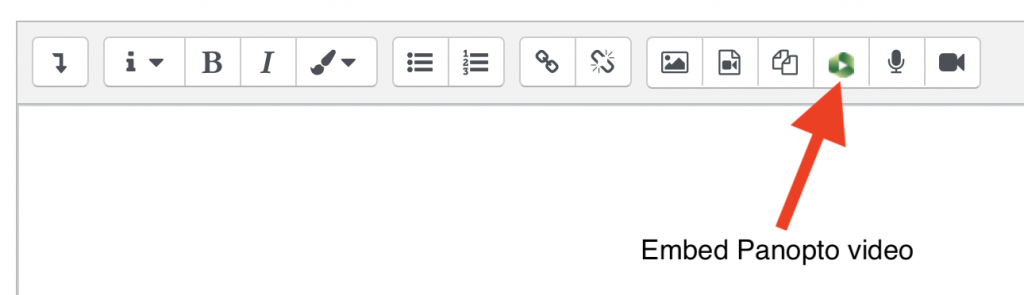
By default, your recordings or uploaded video or audio files appear in the Panopto block within Moodle. You can also embed videos anywhere in Moodle that has a rich-text editor. For example, you can add a new Page Resource in Moodle and embed the video there.
To embed a video, go to a place that you can edit text and click on the Panopto icon on the editor toolbar. Find your video and select it to insert it into the page.
#3 Insert a Panopto Link
You can also simply add a URL link to your Moodle page in any of the sections. Students can view the video once they click on the link as opposed to embedding the video into the page.
You can do this by first logging into Panopto at www.panopto.swarthmore.edu. Then, click the share button next to the video you’d like to link to. Next, copy the share link from the Panopto video.

Now, return to Moodle and select the URL Resource after you’ve turned editing on. Next, paste the link into the External URL section. Make sure to name the link resource, then click Save and Display.

Bonus Tip: Panopto Can Auto-Caption Videos
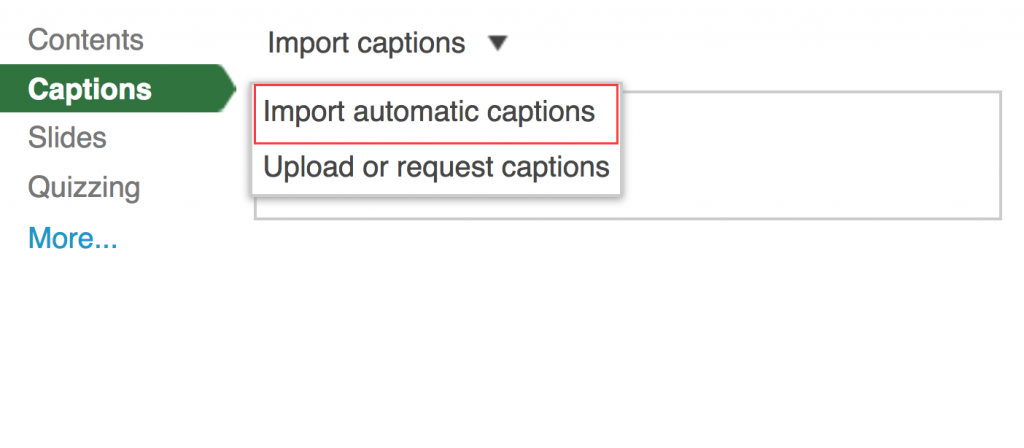
Panopto can also create auto-captions for your videos. Its accuracy rate is about 80% so it is advised that after the initial pass of auto-captioning, you go back into the Panopto Editor and make edits where misspellings and other inaccuracies have occurred. Alternatively, you can also reach out to one of the Academic Technologists to request your video be sent out to a service provider for captioning as well. If you’d like to learn more, please visit our Help Documentation on how to use Auto-Captioning in Panopto.
Learn More
There are so many other ways to use Panopto! If you’d like to learn more about Panopto or which classrooms are “Panopto ready” with built-in microphones for lecture capture, please take a look at our Help Documentation on Panopto Video Streaming and Lecture Capture. Also, please don’t hesitate to reach out to us at acadtech@swarthmore.edu so we can discuss the best options for you!