From the Makerspace at Swarthmore College.
What is screen printing?
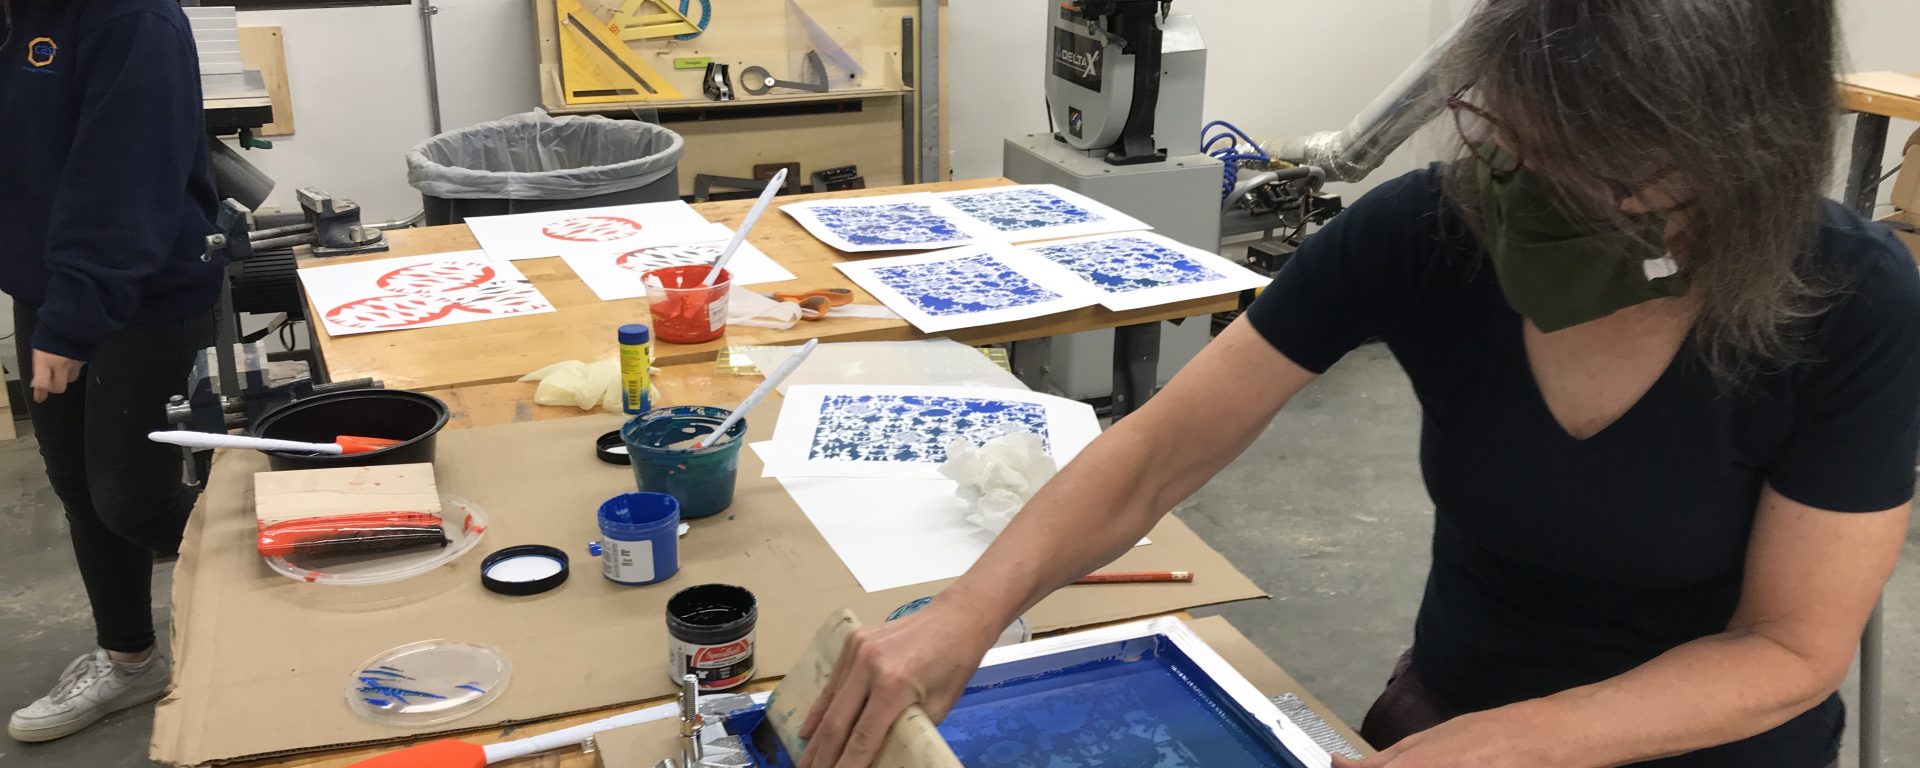
Screen printing, also known as silk screening, is a process by which a design is made to be used as a stencil. A screen, stretched on a frame with the stencil attached or embedded, is then placed on top of a flat surface (this may include paper, a t-shirt or other fabric, wood, and more). Ink is then placed along the far end of the screen, within the frame, and then pulled across the screen at roughly a 45 degree angle using a squeegee. This presses the ink through the openings in the stencil and onto the chosen surface, revealing the design.
We closed out this past Fall semester with a screen printing webinar taught by Andrea Packard from Swarthmore College’s List Gallery. The Makerspace added supplies for screen printing to the list of tools and materials available to students, staff, and faculty.
How do I get started?
One easy way to start screen printing is by using the tracing paper method. To make it easy, we’ve provided the list of supplies that we used for Andrea’s webinar in this Google Doc, which include stretched screens, ink that can be used on paper or fabric, a sturdy type of paper that can take moisture without buckling, tracing paper, and more.
The Tracing Paper Method:
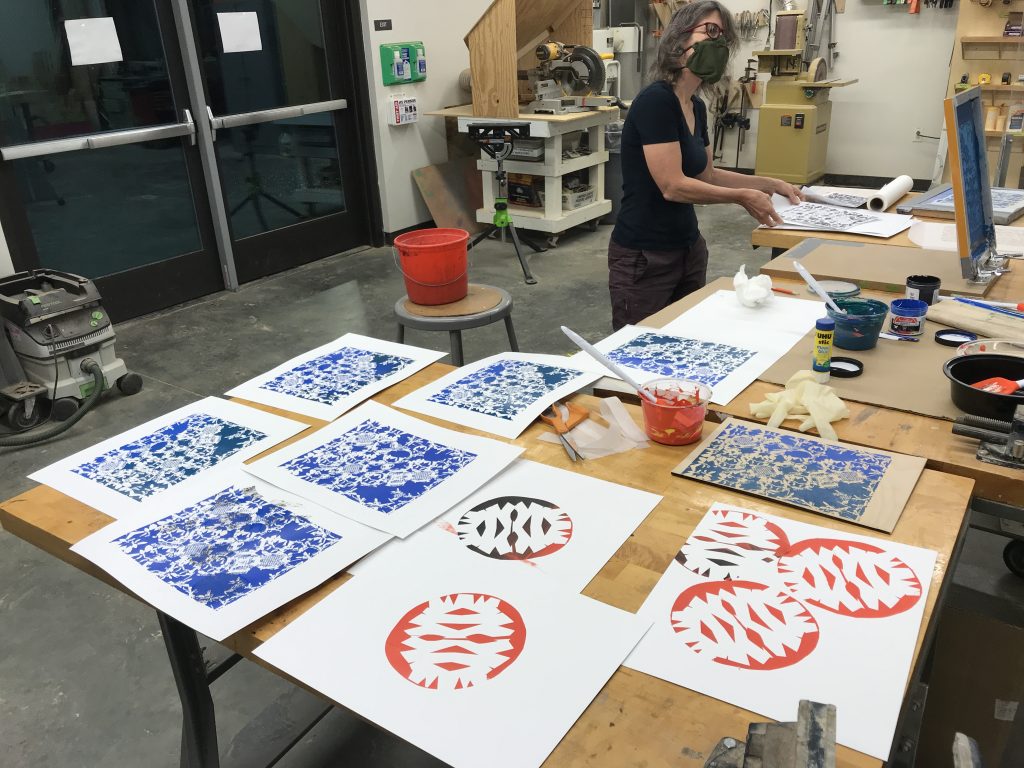
Your design inspiration can come from a photo, a combination of images, or anything from life that inspires you. Multi-colored designs can be achieved by creating a different stencil for each color, then drying each layer before the next is applied. We recommend starting with one or two colors to get a feel for the process. The screen also has to be cleaned and dried between each color.
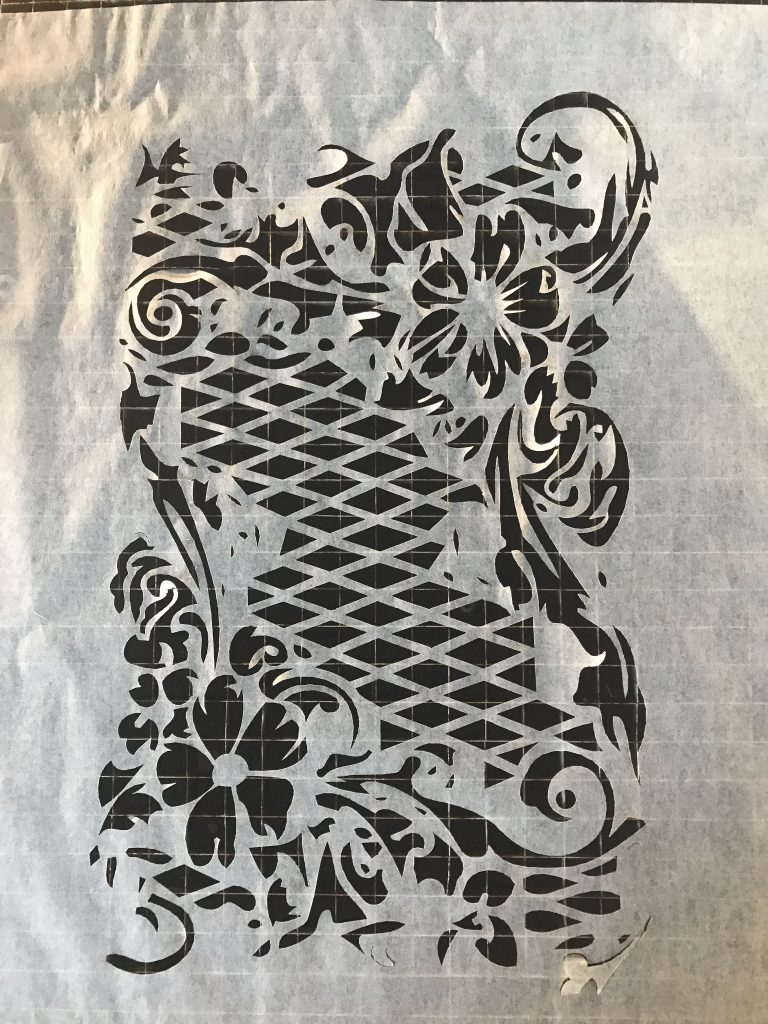
Step One: Draw out your design onto tracing paper. Try to simplify complex shapes, and avoid making very thin lines, as the ink may not pass through unless there is some width to your lines.
Step Two: Cut the tracing paper to the size of your screen, so that it just overlaps the point where the screen and frame meet. Cut out your design with an xacto blade. As Andrea demonstrated in the webinar, you can also experiment with cutting and tearing the tracing paper into abstract shapes. Be sure that your design is smaller than the screen size, leaving about a 1.5″ to 2″ margin. For our design, we used the Makerspace laser cutter.
Step Three: Gather your printing surface (we recommend starting with a smooth, sturdy paper like bristol board), squeegee, ink, spatulas, duct tape, and screen. Pre-mix ink colors in clean containers with lids.
Step four: Place duct tape at the top and bottom margins of your screen, overlapping the frame. This will provide an area for your ink to pool at the top and bottom without leaking out or affecting the print. Some people prefer to duct tape a margin around the entire edge of the frame.
Step Five: Place your bristol board on a flat surface. A rough surface can create inconsistencies in the ink pull. Position your cut tracing paper stencil on top of your printed surface where you would like the print to be, then place your screen face down on top of your tracing paper stencil. Check to be sure the stencil is positioned correctly, overlapping the edges of the screen, but not protruding on the outside of the frame (if this occurs, just cut away any excess or reposition the stencil).
Step Six: Using your spatula, scoop out some ink along the top / far end of your screen. Try to get an even amount across the top margin. The amount of ink you need will depend on the size of your screen. You can always put the extra unused ink back into the container later.
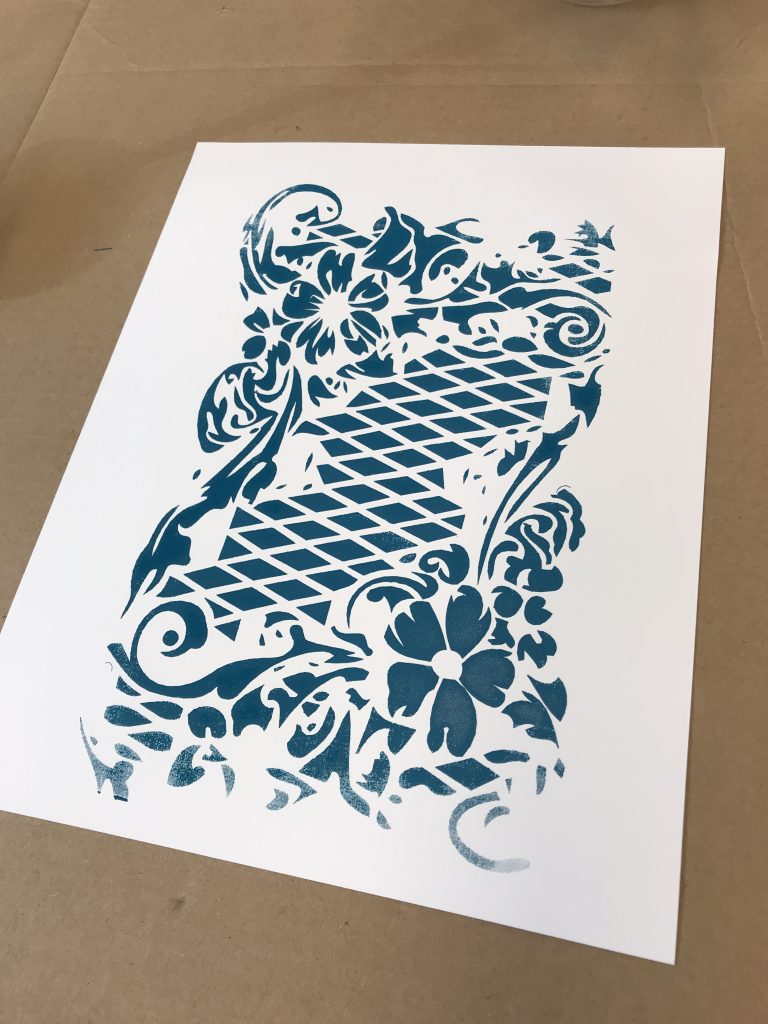
Step Seven: Placing your squeegee at the top of your screen at a 45 degree angle, press firmly and pull the squeegee toward you and toward the bottom margin of the screen. The ink should have spread across the entire surface of the screen and should now be pooling at the bottom margin. The first time you pull the ink, some of the ink gets used to saturate the screen, so it’s a good idea to scoop the ink up with your squeegee and do another pull to make sure the ink presses all the way through the stenciled design onto your bristol.
Step Eight: Be careful lifting your screen. The bristol may stick to the screen as you lift it. Gently pull down on one of the corners of the bristol, letting it fall away from the screen without sliding across the surface. (If the paper slides while touching the screen, you will smear the design and get ink on an area of the screen you don’t want. A way to solve this is by placing a piece of newsprint under the screen and pulling the squeegee until the contaminated area of the screen is blotted away.)
Step Nine: Set your print aside in a clean area to dry, and repeat the process with a new sheet of bristol until you have a set of multiple prints. Wash the screen and squeegee, and make sure everything has fully dried before starting on the next color.
Tips:
If you are doing a multi-color design, start with your lightest color and work to your darkest.
If you are approved to be on campus, you can create your design in a vector program like Illustrator, and have our laser cutter do the cutting work for you!
If you decide you love screen printing, there is another process that involves photosensitive emulsion. It requires a bit more of a setup, but provides more accurate results, and you can repeatedly wash the screen without losing your design. Here is a video demonstrating that process.
Share your home projects with the Swarthmore Makerspace! We love featuring our makers on Instagram. Stay tuned for more project ideas and developments in the Makerspace at Swarthmore College.