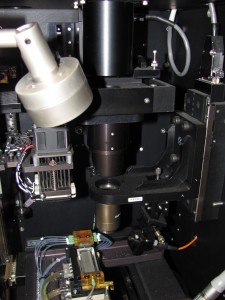
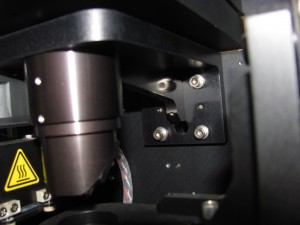
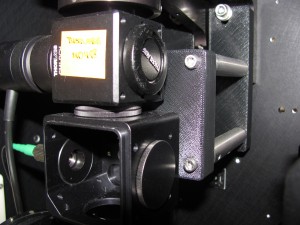
The imaging core from the GAIIx has a dichroic for the focusing laser mounted above the objective and below the tube lens and filter wheel in the infinity space of the microscope. The laser comes in from the back of the crate (hole at the back in the second image) and hits the dichroic (diagonally mounted at the bottom of the cylinder).
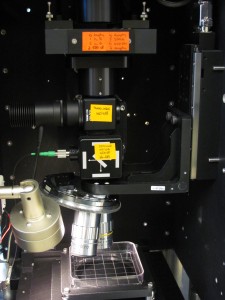
We wanted to use a high power LED as a fluorescence light source and an IR laser as a way of heating cells in the RootScope II. To do this we removed the dichroic and designed a mount which allows us to use Thorlabs filter cubes (CM1-DCH and DFM – others should work too) to replace the original dichroic without altering the rest of the optical train.
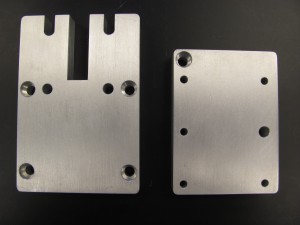
The filter cubes are mounted on two 5/8″ thick plates (back plate on the left, front plate on the right in the image below). These can be machined out of 5/8″ aluminum or printed on a 3D printer.
Solidworks and STL files for the plates can be found here.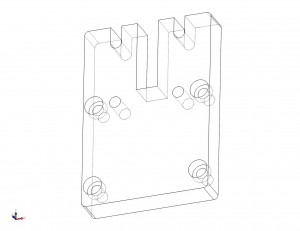
The back plate bolts on top of the bracket which supports the tube lens. The front plate is connected to the back plate using 3″ long 1/2″ optical posts (TR3). The filter cubes then attach to the front plate. The CM1-DCH cubes are 0.03″ taller (to the center of the filter) than the DFM cubes so if using DFM cubes three 0.01″ shims are required. That is all there is to adding your own optics to the imaging core.
